Monday, March 20, 2017
New site
Please go to knittingwithchildren.com Everything is in development but goodies are coming soon. Like the Facebook page and Twitter for updates.

Monday, December 19, 2016
Thank you
I just wanted to say thank you to visitors and readers of this blog. stay tuned ...in January I am launching a project related to children's knitting
Thank you!
Thank you!
Sunday, February 1, 2015
Third Grade Extra Project
In building capacities for weaving, we made these Complex Ojo De Dios. I called them "double God's eyes" and the third graders were very excited for this challenge!
Here are the instructions and my students' work follows:


Here are the instructions and my students' work follows:
Monday, February 25, 2013
Crochet
Crocheting is much different than knitting. I've found it is harder for the children to learn, and easier for them to do. Is this because of where they are developmentally?
Because crochet uses one tool, and this one tool is held in the dominant hand, I bring it at two different times, depending on the class.
The first time is during the last half of second grade. The movement of the hook strengthens dominance, especially in children who have issues with hand dominance, or sensory integration issues. The movement of the hook requires building the capacity for a fluidity and rhythm that is needed in cursive writing. Because children are introduced to cursive writing in second grade at a Waldorf School, this fits nicely.
The other time I bring crochet is in the third grade. Children in third grade in a Waldorf school experience the "nine year change". Much is written about this change, so I won't go into detail here, but the basic idea is that children are "waking up" to their inner life. Their subjective inner reality comes to meet objective outer reality and it is an exciting and somewhat difficult time in a child's life.
Because of this awakening of ego, crochet and stitching meet the needs of the child at this time. The pointed, direct gesture of crochet contrasts the dreamier, bilateral rhythm of knitting. In crocheting, too, the will is awakened. One must have the capacity to balance sympathy and antipathy. For example, students toward either placing too many stitches into one stitch, or skipping stitches. The balance is to be wakeful enough to hold back where necessary, and determine the right time for moving forward. Is this not the lesson for our own egos? Holding on, letting go.
I begin with a flute case and a discussion of the color work I learned in my training. The challenge is to "blend" two colors gradually from top to bottom, ending with the light color on the top. The flute case is made during second grade, or at the beginning of third. If I have an older or more "wakeful" (aware, intellectual) second grade class, I will bring crochet in second grade. Otherwise, I feel capacities are still being built through knitting and will continue that.
Here is my flute case:

Next comes a hat in third grade, and this is where the sculptural possibilities of crocheting are seen. We do not use a pattern, but instead fit the heat to our heads as we stitch. Colors are freely changed with two rules: the colors you choose must make the top of your head shine, and make your face shine.
Here is my daughter's hat:

Third graders may move on to making Granny squares. In third grade, we also have an auxiliary handwork class where we wash, card, spin, dye, and weave.
Here are a couple of poems for teaching crochet. I start with a story a class or two before bringing the actual skill.
If your garden you would grow, I'll tell you softly what I know
Into the ridge, now place it deep, put it under those two feet
And now pull through the dirt, and seal where you've sown
That is how your garden will grow!
Steer your boat under the bridge of two
Catch one fish and pull it through
Catch another and with the hook fetch
See where you are and on to the next!
I hope to have good pictures of the process of crocheting next week, similar to the knitting ones.
Because crochet uses one tool, and this one tool is held in the dominant hand, I bring it at two different times, depending on the class.
The first time is during the last half of second grade. The movement of the hook strengthens dominance, especially in children who have issues with hand dominance, or sensory integration issues. The movement of the hook requires building the capacity for a fluidity and rhythm that is needed in cursive writing. Because children are introduced to cursive writing in second grade at a Waldorf School, this fits nicely.
The other time I bring crochet is in the third grade. Children in third grade in a Waldorf school experience the "nine year change". Much is written about this change, so I won't go into detail here, but the basic idea is that children are "waking up" to their inner life. Their subjective inner reality comes to meet objective outer reality and it is an exciting and somewhat difficult time in a child's life.
Because of this awakening of ego, crochet and stitching meet the needs of the child at this time. The pointed, direct gesture of crochet contrasts the dreamier, bilateral rhythm of knitting. In crocheting, too, the will is awakened. One must have the capacity to balance sympathy and antipathy. For example, students toward either placing too many stitches into one stitch, or skipping stitches. The balance is to be wakeful enough to hold back where necessary, and determine the right time for moving forward. Is this not the lesson for our own egos? Holding on, letting go.
I begin with a flute case and a discussion of the color work I learned in my training. The challenge is to "blend" two colors gradually from top to bottom, ending with the light color on the top. The flute case is made during second grade, or at the beginning of third. If I have an older or more "wakeful" (aware, intellectual) second grade class, I will bring crochet in second grade. Otherwise, I feel capacities are still being built through knitting and will continue that.
Here is my flute case:

Next comes a hat in third grade, and this is where the sculptural possibilities of crocheting are seen. We do not use a pattern, but instead fit the heat to our heads as we stitch. Colors are freely changed with two rules: the colors you choose must make the top of your head shine, and make your face shine.
Here is my daughter's hat:

Third graders may move on to making Granny squares. In third grade, we also have an auxiliary handwork class where we wash, card, spin, dye, and weave.
Here are a couple of poems for teaching crochet. I start with a story a class or two before bringing the actual skill.
If your garden you would grow, I'll tell you softly what I know
Into the ridge, now place it deep, put it under those two feet
And now pull through the dirt, and seal where you've sown
That is how your garden will grow!
Steer your boat under the bridge of two
Catch one fish and pull it through
Catch another and with the hook fetch
See where you are and on to the next!
I hope to have good pictures of the process of crocheting next week, similar to the knitting ones.
Tuesday, November 9, 2010
Teaching children how to knit
updated: please go to https://www.facebook.com/knittingwithchildren/?ref=bookmarks
to stay abreast of a new website, coming soon, that will give you everything you need to know to teach children to knit, and support you and your children in a developmental, imaginative, gentle way. Patterns and stories included.
Before learning to knit, I treat the children to a story (which I hope to type out tomorrow). The story sets the stage for their knitting skills, puts them in a listening place, and allows for a "sleeping". In other words, they take in information from the story, let it rest for a day or two, and then we proceed with knitting.
After we have cast on 12 stitches for a Curly Cat, it is time to make our first stitches. I use the poem, "In through the front door, run around the back, peek through the window, off jumps Jack."
 Lift the latch first.
 In through the front door by taking the needle from front to back, and through the first loop.
 Drop your right hand for now and hold the "X" in your left hand.
 Take your right hand and "stir the pot", meaning, take the yarn in your hands, and draw an imaginary circle around the needle, moving from right to left.


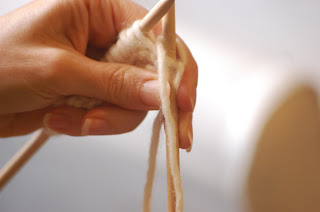 The pot has been stirred and now the yarn is hanging in between the two needles, in front.
 Now, take right hand Pointer finger and place him directly on the yarn that was hanging, sandwiching it in between pointer and the needle. (I say, 'snug Jack up- he's cold')
 Keeping your hands loose so you can place the tip of the right hand needle on the shaft of the left hand needle, and keeping Jack snug (this is the tricky part) "tickle, tickle" your way down the shaft and under the loop. The tip of right hand needle travels down as it tickles the left one. It will, naturally, come under the left-needle loop.

 tickle tickle!
 Now push the tip through and up, and with a smooth motion, move the stitch (yes, you just made a stitch!) to the right and off the needle. But just one!
 Off jumps Jack!
Now repeat with the remaining stitches on the needle.
When all the stitches have been transferred to the other needle , switch hands and begin again. The last and first stitches are hard for children...teach them to make the first and last stitches a bit more snug. Keep the work pointing down and it will be easier to get in that first front door.
Repeat forever and ever and ever until you have effectively established a good knitting rhythm, and a very nice knitting habit.
(thank you, Kristin, my dear, beloved friend and now hand model.)
to stay abreast of a new website, coming soon, that will give you everything you need to know to teach children to knit, and support you and your children in a developmental, imaginative, gentle way. Patterns and stories included.
Before learning to knit, I treat the children to a story (which I hope to type out tomorrow). The story sets the stage for their knitting skills, puts them in a listening place, and allows for a "sleeping". In other words, they take in information from the story, let it rest for a day or two, and then we proceed with knitting.
After we have cast on 12 stitches for a Curly Cat, it is time to make our first stitches. I use the poem, "In through the front door, run around the back, peek through the window, off jumps Jack."


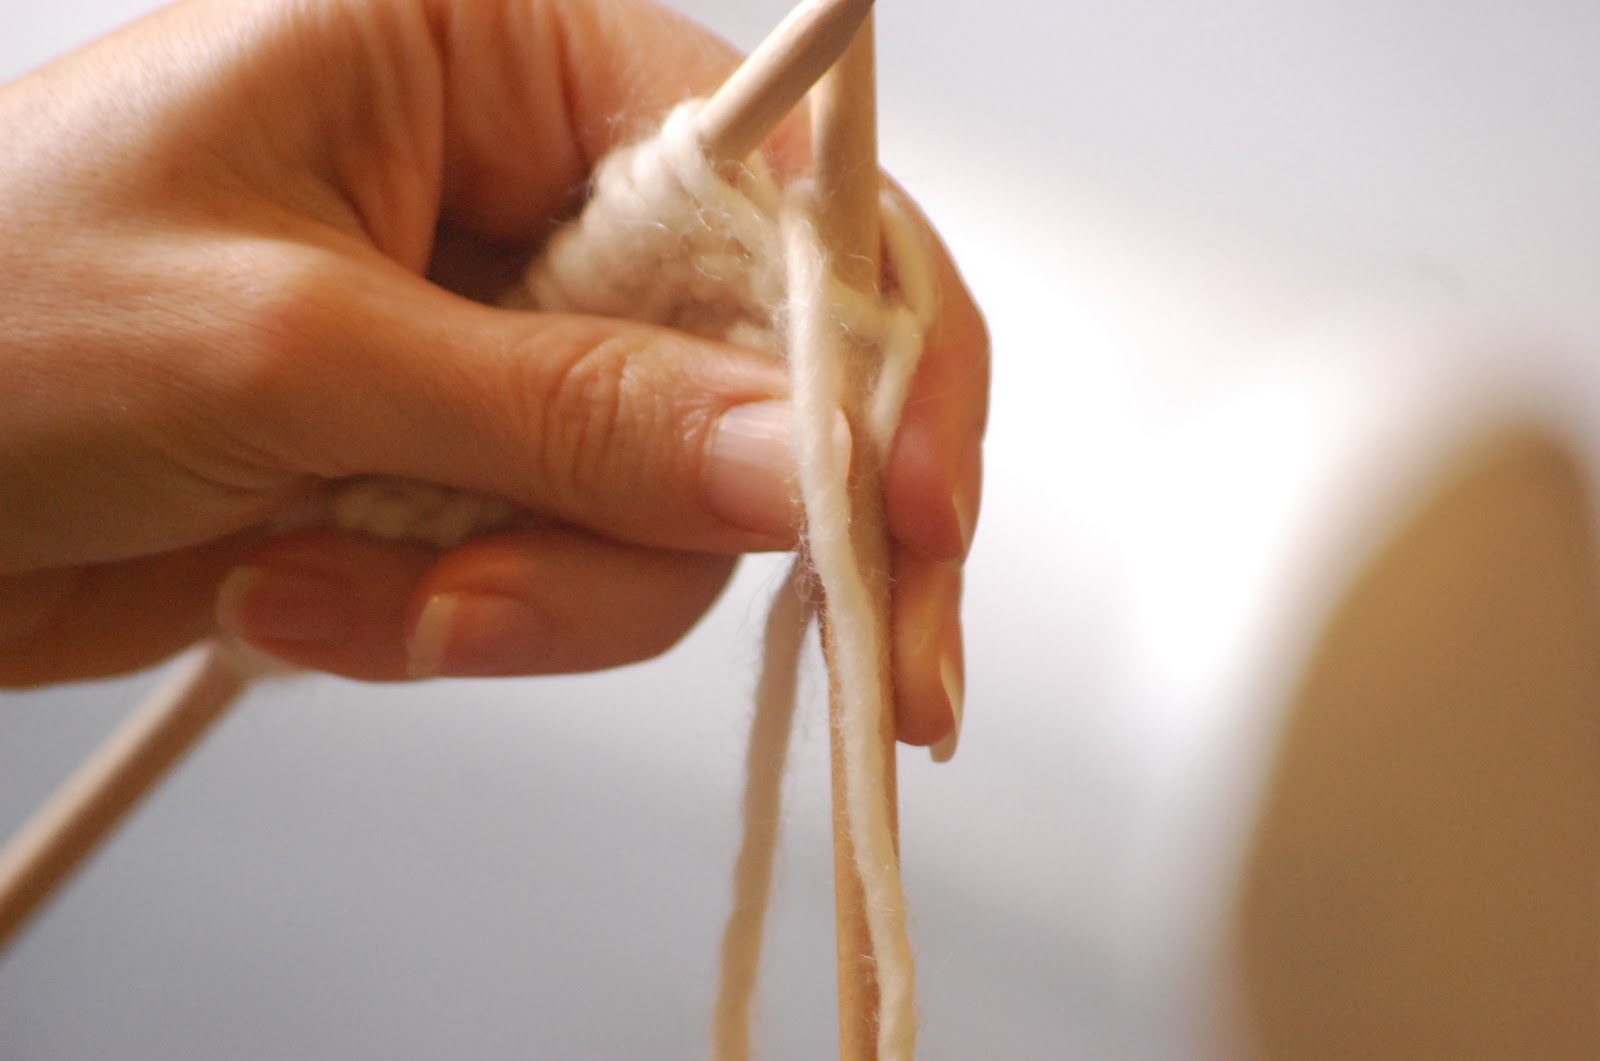


Now repeat with the remaining stitches on the needle.
When all the stitches have been transferred to the other needle , switch hands and begin again. The last and first stitches are hard for children...teach them to make the first and last stitches a bit more snug. Keep the work pointing down and it will be easier to get in that first front door.
Repeat forever and ever and ever until you have effectively established a good knitting rhythm, and a very nice knitting habit.
(thank you, Kristin, my dear, beloved friend and now hand model.)
Monday, May 17, 2010
Third Grade Fiber block
This is what we do in our school. I know there are many different ways to go about this. Some schools hav an extra practical skills class all year long in third grade. We devote 2 weeks of main lesson time (or ten mornings total, if two weeks can't be done consecutively) to the fiber block. I usually introduce the task, and then have another project.
An outline of the block:
Day One: Wash a raw fleece, make felt balls
Day Two: Card the fleece, make felt balls with the fleece we carded being in the center
Day Three: Spin with a drop spindle in pairs, make God's Eyes using bamboo skewers and embroidery floss
Day Four: Spin with a drop spindle individually, make God's Eyes with three sticks instead of two
Day Five: Make small skeins of yarn, dye with synthetic dyes
Day Six: Warp a small card, begin weaving a pouch (the project is found in The Children's Year), spinning wheel introduction and drum carder
Day Seven: Continue weaving, felt a small pouch
Day Eight: Continue weaving, sun dyeing in jars with natural dyes
Day Nine: Finish weaving the pouch, finish sewing it up, butterfly cord and/or braiding a strap
Day Ten: Make a flat felt, review,
When I went to the handwork conference, I spoke to another handwork teacher who introduced vocabulary words and also some math in weighing wool, measuring, etc. This really inspired me, although I was not able to integrate much of what she was doing this year, except I did have my class write a thank you note to the shepherdess who generously gave us our Shetland fleece, and they included some of the terms they'd already learned. I haven't come up with a comprehensive list yet, but there are so many spinning and sheep words they can learn.
In introducing this block, we talked about all the different kinds of fiber, and what our clothes are made of. They looked at each others' tags and we discussed which was from plants, which from animals. I showed them pictures of different sheep. They got to take a field trip to Shaker Village, where they saw all kinds of plant dyeing and a sheep being shorn, and tools for spinning flax, along with looms and other fiber equipment.
I higly recommend the book, Unraveling Fibers. If you have never done any of these things yourself, I recommend going to a fiber festival and acquainting yourself with a few sheep farmers. You can also try localharvest.org to find a fleece or a sheep farmer near you. Visit a sheep, by all means! Get in touch with the local spinning guild and see if anyone there does teaching or demonstrations to children.
If you are experienced in this, please feel free to share what you do with the children. I am going to write a bit more on the details of what each class is like, each day. Tomorrow!
An outline of the block:
Day One: Wash a raw fleece, make felt balls
Day Two: Card the fleece, make felt balls with the fleece we carded being in the center
Day Three: Spin with a drop spindle in pairs, make God's Eyes using bamboo skewers and embroidery floss
Day Four: Spin with a drop spindle individually, make God's Eyes with three sticks instead of two
Day Five: Make small skeins of yarn, dye with synthetic dyes
Day Six: Warp a small card, begin weaving a pouch (the project is found in The Children's Year), spinning wheel introduction and drum carder
Day Seven: Continue weaving, felt a small pouch
Day Eight: Continue weaving, sun dyeing in jars with natural dyes
Day Nine: Finish weaving the pouch, finish sewing it up, butterfly cord and/or braiding a strap
Day Ten: Make a flat felt, review,
When I went to the handwork conference, I spoke to another handwork teacher who introduced vocabulary words and also some math in weighing wool, measuring, etc. This really inspired me, although I was not able to integrate much of what she was doing this year, except I did have my class write a thank you note to the shepherdess who generously gave us our Shetland fleece, and they included some of the terms they'd already learned. I haven't come up with a comprehensive list yet, but there are so many spinning and sheep words they can learn.
In introducing this block, we talked about all the different kinds of fiber, and what our clothes are made of. They looked at each others' tags and we discussed which was from plants, which from animals. I showed them pictures of different sheep. They got to take a field trip to Shaker Village, where they saw all kinds of plant dyeing and a sheep being shorn, and tools for spinning flax, along with looms and other fiber equipment.
I higly recommend the book, Unraveling Fibers. If you have never done any of these things yourself, I recommend going to a fiber festival and acquainting yourself with a few sheep farmers. You can also try localharvest.org to find a fleece or a sheep farmer near you. Visit a sheep, by all means! Get in touch with the local spinning guild and see if anyone there does teaching or demonstrations to children.
If you are experienced in this, please feel free to share what you do with the children. I am going to write a bit more on the details of what each class is like, each day. Tomorrow!
Wednesday, March 31, 2010
Tuesday, February 9, 2010
Casting On
updated: please go to https://www.facebook.com/knittingwithchildren/?ref=bookmarks
to stay abreast of a new website, coming soon, that will give you everything you need to know to teach children to knit, and support you and your children in a developmental, imaginative, gentle way. Patterns and stories included.
When teaching children to cast on, I usually tell a story the day or two before about a boy with a ship. Then, I retell the story, adding instruction and supplies. I give each student a rolled ball of white yarn and one knitting needle.
There was a boy who found a treasure map one day. The treasure map had a curious inscription:to stay abreast of a new website, coming soon, that will give you everything you need to know to teach children to knit, and support you and your children in a developmental, imaginative, gentle way. Patterns and stories included.
When teaching children to cast on, I usually tell a story the day or two before about a boy with a ship. Then, I retell the story, adding instruction and supplies. I give each student a rolled ball of white yarn and one knitting needle.
If you would climb Thumb Mountain, then over to Pointer Mountain soar,
Scoop up the gold , under vines, back home, then treasure will be yours.
This boy, when he read those words, knew exactly where to find thumb mountain. It was an easy journey for him, and he knew it well. He had a ship, and he knew just how to sail it.
This is your ship. Put your slip knot on the knitting needle, with pads of fingers touching the shaft. I tell the students to hold their needles 'birds on a wire' so their fingers are a bit looser. Some want to grip the needle in a fist...help them hold their fingers over the needle like so:

Now you can sail your ship up, down, and through waves.
The boy knew he was getting close because he could see the beach. He then set out to anchor his ship by grabbing the line hanging from it.

Then, he split the line so the boat would be steady while he was gone.

At this point in the story, the tip of the knitting needle becomes the boy.
Now it was time for the ship to rest and for the boy to go to the island to find treasure. He landed on the beach. The knitting needle comes forward and down. The "mountains" stand strong.

Now the boy crept up Thumb Mountain, under the vines, all the way to the top, and he never fell off. He remembered the writing:
If you would climb Thumb Mountain, then over to Pointer Mountain soar,
Scoop up the gold , under vines, back home, then treasure will be yours.
From the top of Thumb Mountain, he could see Pointer Mountain. He flew over, because he was a very special boy and could do things like that.

You will notice my hand has turned to the side here. The boy is on top of Pointer Mountain.
Now he sees the gold and scoops it up, and flies back to the top of Thumb Mountain.

The yarn coming from Pointer has been scooped and is on its way to Thumb.

Now the boy is on Thumb mountain and is ready to go home. He slides down Thumb Mountain, under the vines with his treasure, and lands on the beach.

He is back home on the beach! Now take your whole hand out and pull one of the strings to close the loop. You will have two stitches on the needle now. Congratulations! A continental cast-on. Start the whole process again to cast on the rest of the stitches (there's more gold in those hills!)
Eventually, instead of taking out your whole hand, you can simply sweep your thumb across to close the last loop.
See knittinghelp.com for a video of the Continental Cast-On.
Thursday, February 4, 2010
Fifth Grade cable-knit hat
Cast on 14.
Begin knitting sequence as follows:
Row one: knit two, purl two, knit 6, purl 2, knit two
Row 2: K 4, P 6, K 4
Repeat these two rows 5 more times, ending on a purl row
Next row: Knit 2, purl 2, slip next 3 stitches to a cable needle and place it in back, K3, K 3 from cable needle, purl 2, knit 2
Repeat row 2
Repeat this whole sequence until the knitted band fits around your head. Cast off, sew ends together neatly. Pick up stitches around the side of the band with a 12" circular needle. Aim for between 60 and 80 stitches (80 will make the hat slouchy-er)
Plain knit for about 4 inches. Divide the number of stitches by 5 (X), and knit one round as follows: knit (X) amount of stitches, place marker.
Knit to 2 stitches before each marker, knit 2 together and knit a round in between. If the hat looks too tall for your 5th grader, then simply eliminate the round of knitting in between.
Feel free to play with the cable knitting. See this site for a video on crossing cables. We use a very short double-pointed needle or an extra sock needle for the cables. See my own version of this pattern here.
Begin knitting sequence as follows:
Row one: knit two, purl two, knit 6, purl 2, knit two
Row 2: K 4, P 6, K 4
Repeat these two rows 5 more times, ending on a purl row
Next row: Knit 2, purl 2, slip next 3 stitches to a cable needle and place it in back, K3, K 3 from cable needle, purl 2, knit 2
Repeat row 2
Repeat this whole sequence until the knitted band fits around your head. Cast off, sew ends together neatly. Pick up stitches around the side of the band with a 12" circular needle. Aim for between 60 and 80 stitches (80 will make the hat slouchy-er)
Plain knit for about 4 inches. Divide the number of stitches by 5 (X), and knit one round as follows: knit (X) amount of stitches, place marker.
Knit to 2 stitches before each marker, knit 2 together and knit a round in between. If the hat looks too tall for your 5th grader, then simply eliminate the round of knitting in between.
Feel free to play with the cable knitting. See this site for a video on crossing cables. We use a very short double-pointed needle or an extra sock needle for the cables. See my own version of this pattern here.
Monday, January 11, 2010
First Grade Verse
May our hands complete our task with patience, may our work be done with care
May our fingers work as friends together, and may we our friendship share.
May our fingers work as friends together, and may we our friendship share.
Gnomes
Materials: needle size and yarn are at your discretion. I use plant-dyed Brown Sheep bulky and size 10 homemade needles in 3 colors: pants color, shirt color, and skin color.
This is the gnome pattern handed down to me from our previous handwork teacher. It's been in use for over 10 years now, so the children really look forward to making their gnomes every year.
Cast on 12 stitches in pants color, knit a little bit more than a square. Break yarn, push this square to the end of the needle, cast on 12 more stitches, knit a matching "square". Knit across all 24 stitches for 2 rows. Break yarn, switch to shirt color, and knit until the shirt, folded over where the legs seperate, meets the cast-on edge. In other words, the shirt is half of the body now, minus the two long rows for the pants. Break yarn. switch to face color. Look at your gnome. If the "jog" is on the working side of the knitting (the row you are about to knit) then you will purl the first row. Otherwise, knit the next row. Work in stockinette stitch (knit a row, purl a row) until the head is 1/3 of the gnome, ending with a purl row. Next row: Knit 2 together all the way across. Break yarn, leaving a long tail.Thread tail through the stitches on the needle and pull, gathering the top of the head.
Cast on 12 in shirt color, knit a little less than a square, then knit a row, purl a row in skin color. Break yarn, thread needle with tail, gather by pulling yarn through the remaining stitches. (Use the large sewing needle to slip the stitches off the knitting needle) Make another arm. Use the tails to stitch up the arms.
Cast on 24 stitches for hat. Knit 4 rows straight, change colors and knit a stripe for two rows, then knit two together at the beginning of every row until one stitch remains. Break yarn, thread tail through the last stitch.
Sew up the back of the body, making sure the shirt and pants line up. Stuff, then sew the legs together. If you like, cinch around the legs about 4 rows up to make feet.
Cinch around the neck by putting the needle in and over every other stitch right at the color change. Pull tightly, and go around once more. Stitch and stuff the arms, leaving a little room at the top to gather. Run a gathering stitch through the top of the arms, and stitch them right at the neck (this creates shoulders). Flatten the top slightly to make it look like a shoulder.
Add hair if you wish by using a crochet hook to loop the hair through. Sew on the hat. Enjoy your gnomes!

This is the gnome pattern handed down to me from our previous handwork teacher. It's been in use for over 10 years now, so the children really look forward to making their gnomes every year.
Cast on 12 stitches in pants color, knit a little bit more than a square. Break yarn, push this square to the end of the needle, cast on 12 more stitches, knit a matching "square". Knit across all 24 stitches for 2 rows. Break yarn, switch to shirt color, and knit until the shirt, folded over where the legs seperate, meets the cast-on edge. In other words, the shirt is half of the body now, minus the two long rows for the pants. Break yarn. switch to face color. Look at your gnome. If the "jog" is on the working side of the knitting (the row you are about to knit) then you will purl the first row. Otherwise, knit the next row. Work in stockinette stitch (knit a row, purl a row) until the head is 1/3 of the gnome, ending with a purl row. Next row: Knit 2 together all the way across. Break yarn, leaving a long tail.Thread tail through the stitches on the needle and pull, gathering the top of the head.
Cast on 12 in shirt color, knit a little less than a square, then knit a row, purl a row in skin color. Break yarn, thread needle with tail, gather by pulling yarn through the remaining stitches. (Use the large sewing needle to slip the stitches off the knitting needle) Make another arm. Use the tails to stitch up the arms.
Cast on 24 stitches for hat. Knit 4 rows straight, change colors and knit a stripe for two rows, then knit two together at the beginning of every row until one stitch remains. Break yarn, thread tail through the last stitch.
Sew up the back of the body, making sure the shirt and pants line up. Stuff, then sew the legs together. If you like, cinch around the legs about 4 rows up to make feet.
Cinch around the neck by putting the needle in and over every other stitch right at the color change. Pull tightly, and go around once more. Stitch and stuff the arms, leaving a little room at the top to gather. Run a gathering stitch through the top of the arms, and stitch them right at the neck (this creates shoulders). Flatten the top slightly to make it look like a shoulder.
Add hair if you wish by using a crochet hook to loop the hair through. Sew on the hat. Enjoy your gnomes!

Gnomes in progress by second graders at The Waldorf School of Louisville.
Thursday, November 12, 2009
Making knitting needles
Supplies:
1/4 " birch dowel rods (available at craftparts.com, caseyswood.com, dowelsondemand.com, saunders brothers, or your local Woodcraft store.) cut into 10-12" lengths (these make size 10 needles). A word about what kind of wood to buy: you can get the cheaper precut packages of dowel rods, or hardwood dowels at craft stores BUT this type of wood has a tendency to split and does not wear as well as birch. One of the qualities of birch is that it burnishes with repeated use, so the more you use it, the smoother it becomes.
Sandpaper in 150 grit, 220 grit, and 400 or finer grit.
Balls for tops with 1/4" holes, or candle cups with 1/4" hole from the craft store, or salvaged wood beads that fit.
Beeswax (I use modeling beeswax because of its softness. Alternatively, use a scented natural beeswax wood polish)
Wool felt
First, "sculpt" the tops of the needles by sanding them on concrete, stones, or bricks outside. You can also do this with the coarsest sandpaper. I tell students to make the point look like a gnome's hat all the way around. They tend to look like a house roof at first. I have them hold the dowel "birds on a wire": thumb underneath, all other fingers perched on top. Then they can wrap their fingers around the top (not like holding a pencil; thumb and forefinger point the same way...like you are pointing at something only pointer rests on the top of the dowel) and the proceed to sand, taking care to turn the dowel as they go.
Once the point has been fashioned this way, then the needle can be sanded. Wrap the sandpaper around the tip and twist it. Start with the coarse sandpaper first, graduate to the finest (the lower the number, the coarser the sandpaper) and sand until the needles are as smooth as a baby's bottom (determined by running the side of the needle along your cheek) 400 grit sandpaper is the best thing since sliced bread and gives a nice smooth finish.
Next, coat the needle with beeswax (or polish) by rubbing a small piece of wax all over as if crayoning a picture. Wax should be visible on the needle.
Once that is done, take wool felt and working in small areas of the needle shaft, start to rub the wax in. Rubbing quickly in a small area causes the wax to "melt in". Rub until the felt is waxy and all the lint is gone. You should have a nice, shiny pair of knitting needles. Smell them.
Glue your chosen tops on the needles. Color the tops with beeswax crayons and burnish (polish) with your waxy felt. If you are using unfinished wood for your tops, you can use watercolors or even silk dyes to color them. Allow these to dry before burnishing. It is easier to burnish them after the tops are securely glued to the needle.
Enjoy!
*give the sawdust back to the Earth*
*something to try*if you want to experiment with different types of wood, ask a local woodworker to educate you on the qualities of each wood.
1/4 " birch dowel rods (available at craftparts.com, caseyswood.com, dowelsondemand.com, saunders brothers, or your local Woodcraft store.) cut into 10-12" lengths (these make size 10 needles). A word about what kind of wood to buy: you can get the cheaper precut packages of dowel rods, or hardwood dowels at craft stores BUT this type of wood has a tendency to split and does not wear as well as birch. One of the qualities of birch is that it burnishes with repeated use, so the more you use it, the smoother it becomes.
Sandpaper in 150 grit, 220 grit, and 400 or finer grit.
Balls for tops with 1/4" holes, or candle cups with 1/4" hole from the craft store, or salvaged wood beads that fit.
Beeswax (I use modeling beeswax because of its softness. Alternatively, use a scented natural beeswax wood polish)
Wool felt
First, "sculpt" the tops of the needles by sanding them on concrete, stones, or bricks outside. You can also do this with the coarsest sandpaper. I tell students to make the point look like a gnome's hat all the way around. They tend to look like a house roof at first. I have them hold the dowel "birds on a wire": thumb underneath, all other fingers perched on top. Then they can wrap their fingers around the top (not like holding a pencil; thumb and forefinger point the same way...like you are pointing at something only pointer rests on the top of the dowel) and the proceed to sand, taking care to turn the dowel as they go.
Once the point has been fashioned this way, then the needle can be sanded. Wrap the sandpaper around the tip and twist it. Start with the coarse sandpaper first, graduate to the finest (the lower the number, the coarser the sandpaper) and sand until the needles are as smooth as a baby's bottom (determined by running the side of the needle along your cheek) 400 grit sandpaper is the best thing since sliced bread and gives a nice smooth finish.
Next, coat the needle with beeswax (or polish) by rubbing a small piece of wax all over as if crayoning a picture. Wax should be visible on the needle.
Once that is done, take wool felt and working in small areas of the needle shaft, start to rub the wax in. Rubbing quickly in a small area causes the wax to "melt in". Rub until the felt is waxy and all the lint is gone. You should have a nice, shiny pair of knitting needles. Smell them.
Glue your chosen tops on the needles. Color the tops with beeswax crayons and burnish (polish) with your waxy felt. If you are using unfinished wood for your tops, you can use watercolors or even silk dyes to color them. Allow these to dry before burnishing. It is easier to burnish them after the tops are securely glued to the needle.
Enjoy!
*give the sawdust back to the Earth*
*something to try*if you want to experiment with different types of wood, ask a local woodworker to educate you on the qualities of each wood.
Monday, October 26, 2009
First Grade Handwork
In a Waldorf first grade, children learn how to finger-crochet and then move on to basic knitting. Children make projects that are meaningful to them, and the projects and stories still hold a bit of early childhood. I found a list from our school's former handwork teacher and thought it would make a good first post for this blog. I added to and edited it a bit.
What is handwork doing for the first grade child?
-Gradually bringing the child into day consciousness...slowly bringing the child out of the dreamy world of early childhood.
-Awakens thinking and the capacity to judge.
-Moves the child from play to work
-The rhythmic activity of knitting builds the etheric capacities of the child
-Builds confidence
-Develops patience and perseverance since a knitting project takes time
-Awakens feelings through working with color and the very act of creating
-Makes a connection between mankind and nature. Materials used are from the earth, and gratitude and reverence for the earth's gifts are inherently appreciated.
-Balances the child in the sense that it strengthens forces that are weak (Strengthens thinking in the dreamy child, feeling in the overly intellectual child, and stimulates activity in the weak-willed child)
-Great practice in problem-solving. Students have to notice mistakes, keep count of their stitches, and focus while knitting.
-Social development: students admire each others' work, celebrate each others' accomplishments, help each other, and give handmade gifts.
-Builds the capacity to concentrate and focus.
-Builds self-regulation. Students may become frustrated with themselves or where they are in a project and learn how to ask for help, figure it out themselves, or how to wait for help.
-Making something useful and beautiful
-Encouraging a sense of reverence and wonder
What is handwork doing for the first grade child?
-Gradually bringing the child into day consciousness...slowly bringing the child out of the dreamy world of early childhood.
-Awakens thinking and the capacity to judge.
-Moves the child from play to work
-The rhythmic activity of knitting builds the etheric capacities of the child
-Builds confidence
-Develops patience and perseverance since a knitting project takes time
-Awakens feelings through working with color and the very act of creating
-Makes a connection between mankind and nature. Materials used are from the earth, and gratitude and reverence for the earth's gifts are inherently appreciated.
-Balances the child in the sense that it strengthens forces that are weak (Strengthens thinking in the dreamy child, feeling in the overly intellectual child, and stimulates activity in the weak-willed child)
-Great practice in problem-solving. Students have to notice mistakes, keep count of their stitches, and focus while knitting.
-Social development: students admire each others' work, celebrate each others' accomplishments, help each other, and give handmade gifts.
-Builds the capacity to concentrate and focus.
-Builds self-regulation. Students may become frustrated with themselves or where they are in a project and learn how to ask for help, figure it out themselves, or how to wait for help.
-Making something useful and beautiful
-Encouraging a sense of reverence and wonder
Subscribe to:
Posts (Atom)